双机调试Windbg必须管理员权限启动
Windows7 x86配置
-
配置Windows 7的调试模式
bcdedit /dbgsettings serial baudrate:115200 debugport:1 bcdedit /copy {current} /d DebugEntry bcdedit /displayorder {current} {xxxxxxxx-XxxX-XXXX-XXXX-XXXXXXxxxxxx} bcdedit /debug {xxxxxxxxx-XXXX-XXXX-XXXX-XXXXXXXXXXXxX} ON bcdedit /timeout 60 reboot #运行 bcdedit /copy {current} /d DebugEntry 获取UUID # {9e0a3fea-27a1-11ed-b37d-98babdeb4828}x86 # {cc4a8da3-27b6-11ed-8e82-b752faa540af}x64 # bcdedit /displayorder {current} {cc4a8da3-27b6-11ed-8e82-b752faa540af} # bcdedit /debug {cc4a8da3-27b6-11ed-8e82-b752faa540af} ON -
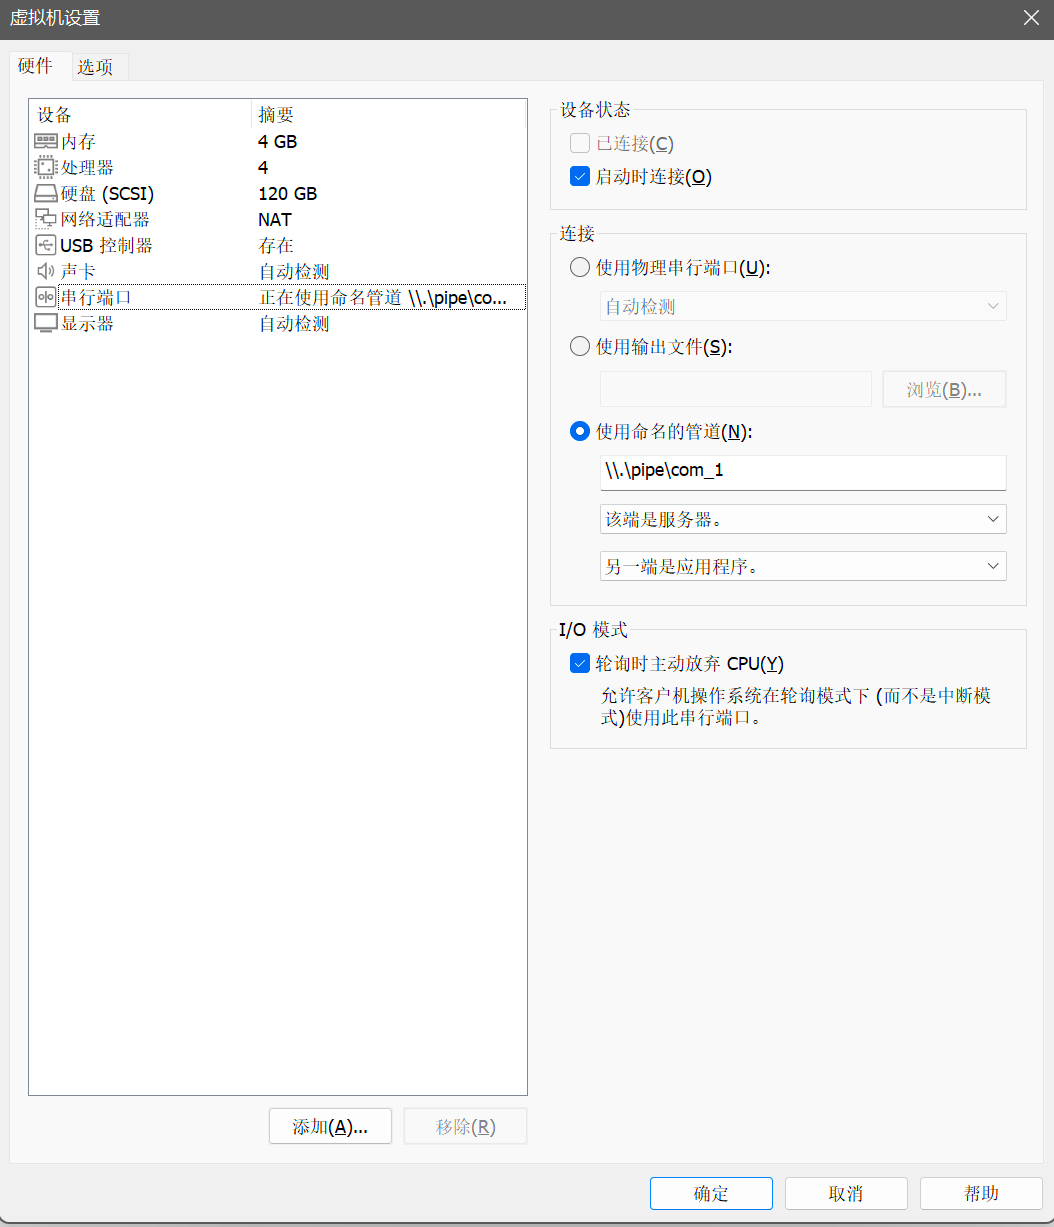
配置VMware的Windows 7虚拟机硬件
-
添加串行端口:\\.\pipe\com_1
注意:com_1的名称可随意设置,但是\\.\pipe\一定不能错

-
-
配置Windbg
-
安装symbols文件
配置路径:E:\CodeTools\symbols -
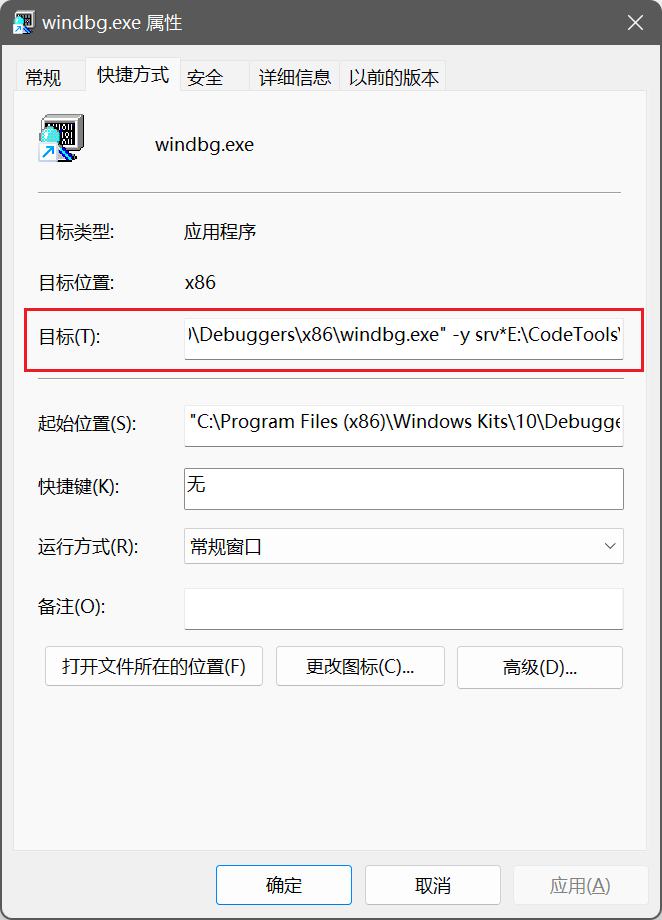
配置Windbg x86快捷方式
powershell "C:\Program Files (x86)\Windows Kits\10\Debuggers\x86\windbg.exe" -y srv*E:\CodeTools\Symbols*http://msdl.microsoft.com/download/symbols -b -k com:port=\\.\pipe\com_1,baud=115200,pipe
Windows7 x64配置
-
配置与Windows7 x86相同
-
永久禁用签名(可能失败,多试一下)
#关闭 bcdedit -set loadoptions DDISABLE_INTEGRITY_CHECKS bcdedit -set TESTSIGNING ON #开启 bcdedit -set loadoptions ENABLE_INTEGRITY_CHECKS bcdedit -set TESTSIGNING OFF -
Windows XP配置
- 修改系统盘根目录的
boot.ini文件
在“运行”中输入“c:\boot.ini”即可启动该文件# 在文件内容尾部加好以下内容 multi(0)disk(0)rdisk(0)partition(1)\WINDOWS="Microsoft Windows XP Professional[DEBUG]" /debug /debugport=com1 /noexecute=optin /fastdetect - 配置串行端口
\\.\pipe\com_1 - Windbg快捷方式配置
"C:\Program Files (x86)\Windows Kits\10\Debuggers\x86\windbg.exe" -y srv*E:\CodeTools\symbols*http://msdl.microsoft.com/download/symbols -b -k com:port=\\.\pipe\com_1,baud=115200,pipe
- 修改系统盘根目录的
